The process of installing a whole-house fan can be simplified into these steps: preliminary marking, marking the installation point, cutting the drywall, setting up a support framework, mounting the brackets, sealing gaps, installing the fan, handling electrical wiring, and finally, attaching the louver frame or grille.
However, When your indoor environment becomes overly warm while the outside air remains pleasant, a whole-house fan presents an effective solution by drawing in the cooler outdoor air. Positioned discreetly in the ceiling just beneath the attic, the fan remains hidden behind louvers to seamlessly blend with your home’s aesthetics.
Here are some easy steps to solve your problems
How to Choose the Right Fan Size and Ventilation?
To properly size a whole-house fan and ensure efficient ventilation for your living area, follow these steps:
- Calculate the interior square footage of your home’s living area, excluding spaces like the garage, attic, or basement.
- Multiply this calculated area by 3, which will give you the recommended fan size in terms of Cubic Feet of air moved per Minute (CFM).
For instance, if your living area is 2,000 square feet, the calculation would be 2,000 square feet x 3 = 6,000 CFM.
It’s important to note that while a whole-house fan effectively expels warm and stale air into the attic, maintaining proper attic ventilation is essential. To determine the required amount of attic ventilation:
Divide the fan’s CFM by 750. This will give you the recommended square footage of attic ventilation.
Continuing with the example above (6,000 CFM):
6,000 CFM / 750 = 8 square feet of attic ventilation needed.
By following these steps and ensuring the right fan size and attic ventilation, you can create an effective and efficient ventilation system for your home.
What are the Fan Types?
There are four main types of whole-house fans: traditional, insulated joist-mount, ducted, and roof-mounted.
Traditional Fans: These are larger and noisier fans that can let warm air escape during winter due to uninsulated dampers and their size. They often don’t fit between existing joists.
Insulated Joist-Mount Fans: Designed to fit between standard joists, these are easier to install than traditional fans. Motorized insulated dampers automatically open when the fan is on and close when it’s off, helping save energy.
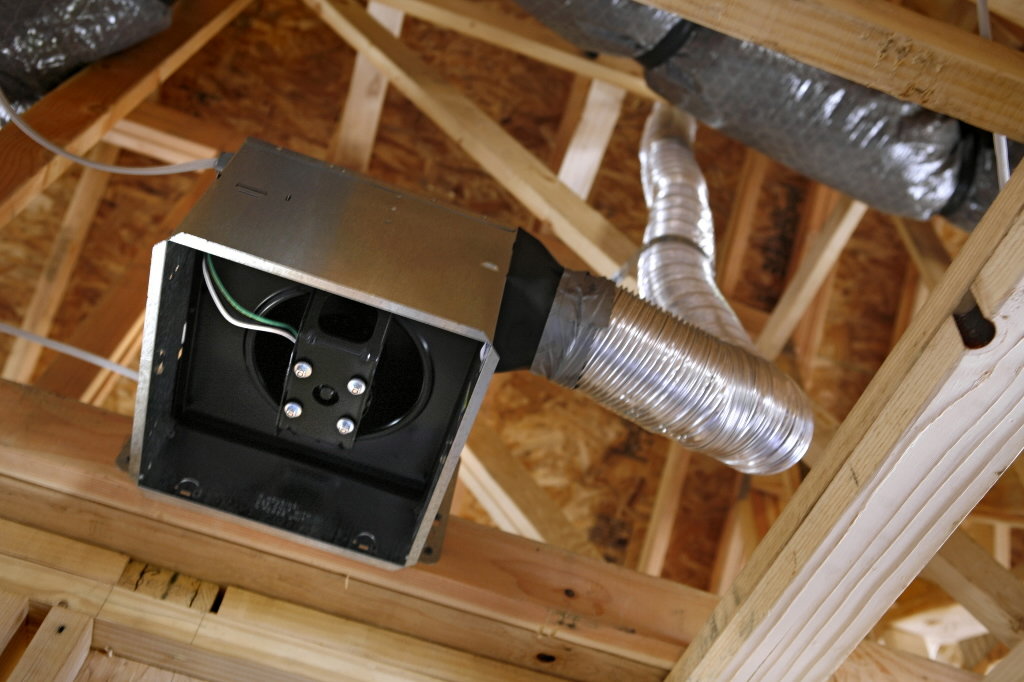
Ducted Fans: Recognizable by their short, curved acoustic duct, these reduce noise and vibration. They’re often installed on attic roof framing with a ceiling-mounted intake vent between joists. Insulated dampers are a feature here as well.
Roof-Mounted Fans: These are for homes without an attic. The fan is mounted on the roof, and connected to the target area by ducts. They tend to be quieter due to their position.
In addition, there are two basic types of whole-house fans: belt-driven fans and direct-drive fans.
- Direct-Drive Fans: The blades are attached to the motor shaft directly.
- Belt-Driven Fans: The blade assembly is separate, using a belt and pulley for air circulation. These are generally quieter.
What is the material needed for installing the whole fan?
| Tools | Materials |
| Tape measure | Whole house fan |
| Drywall saw | 2×4 lumber |
| Circular saw | Screws |
| Drill | Waterproof caulk |
| Caulking gun, screwdriver | Spray foam |
How to Install a Whole House Fan?
To get the most out of your whole house fan, it’s wise to choose a central location for installation.
Plus, assessing your attic space is essential to pinpoint an area between two ceiling joists that can effectively bear the fan’s weight.
- Preliminary Marking for Location: Once you’ve selected the right spot for your new whole-house fan, utilize nails or sturdy wires to poke down through the drywall on either side of the ceiling joists. This gives you a visual reference from below, making installation planning easier.
- Marking the Installation Point: Typically, whole house fans include a template to guide your ceiling cutout. Position this template over the earlier nail or wire indicators, and gently trace its outline with a pencil for precise placement
- Careful Drywall Cutting: Armed with a drywall saw, diligently cut along the marked lines following the template shape. Ensure you’re cautious about dust and debris while working.
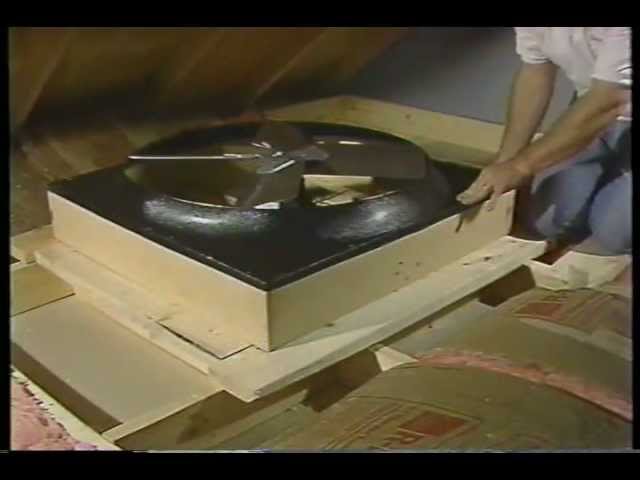
- Creating a Support Framework: Measure the joist gap and cut two lengths of 2×4 lumber accordingly, using a circular saw or miter saw. Place these 2×4 pieces between the joists and secure them using wood screws. This frame bolsters the fan’s weight and reinforces your ceiling.
- Mounting Brackets Installation: Adhere to the manufacturer’s instructions to install the mounting brackets onto the exposed joists and the support framework.
- Sealing Cracks and Gaps: Use waterproof caulking or spray foam to seal any openings or joints between the ceiling, drywall, fan, and damper box. This not only prevents moisture issues but also aids in energy conservation.
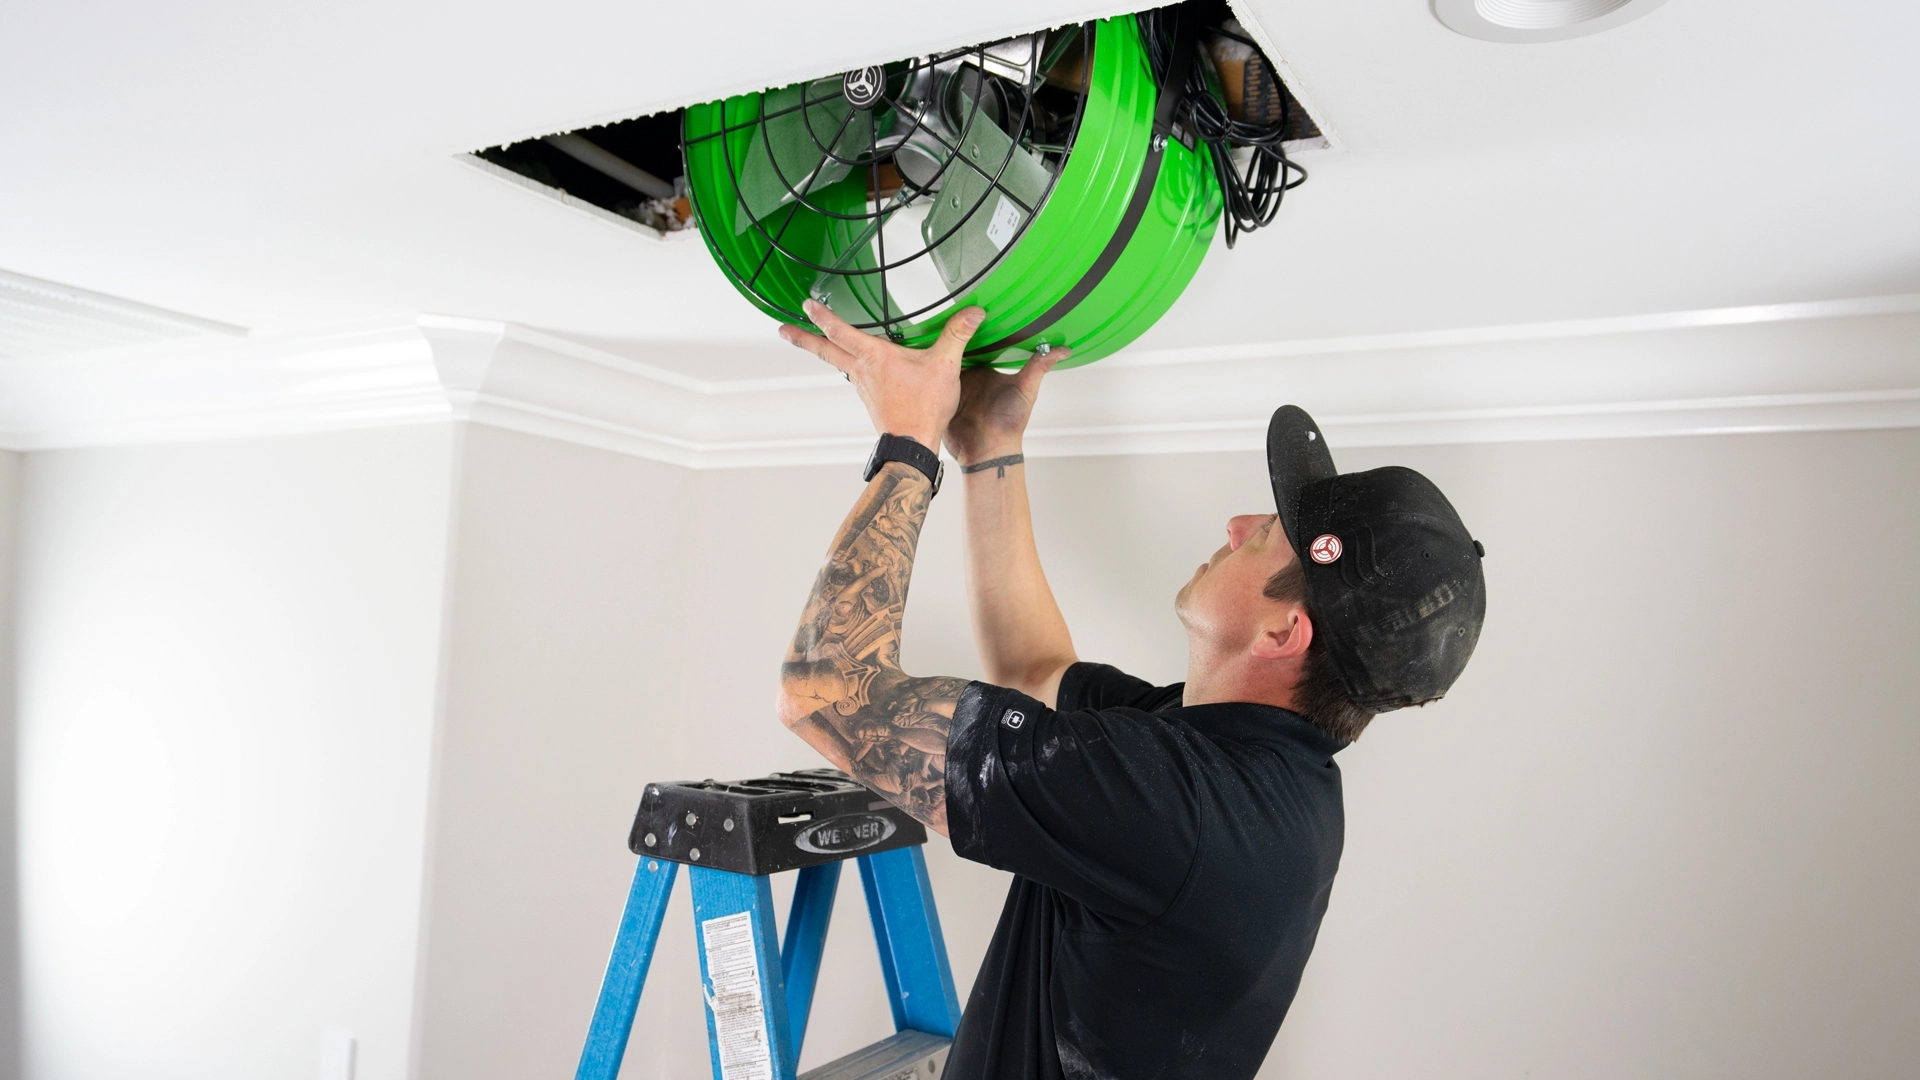
- Securing the Fan: Inside the attic, position the fan over the support frame where the brackets were mounted. Fasten the whole house fan to the brackets using a drill or screwdriver. Consider creating pilot holes before installation for a smoother setup.
- Electrical Wiring: Electrical work requires expertise. It’s recommended to hire a licensed electrician for this step. If you choose to do it yourself, closely follow the manufacturer’s wiring instructions and turn off the power before handling electrical components.
- Installing the Louver Frame or Grille: Descend from the attic and finalize the project by attaching the louver frame or grille. This component covers the ceiling opening while permitting air circulation. Once set, test the fan by turning it on.
What are the precautions that must be taken When dealing with electricity?
Turn Off Power: Begin by switching OFF the electricity at the main fuse box or circuit breaker box that controls the power to the specific fixture or room you’re working on.
Confirm Power Off: For added assurance, test the wires to confirm that the power is indeed OFF.
Switch Position: Make sure to set the wall switch to the OFF position.
Adhere to Codes: All electrical connections must align with local codes. It’s a good practice to consult local authorities to determine if a permit is required for your project.
Seek Expertise: If you’re uncertain, don’t hesitate to reach out to a qualified electrician who can provide guidance.
In the end, in your attic quest for the perfect location, target an obstruction-free spot at the center of the hallway ceiling. Look out for any potential hindrances such as ducts, plumbing, or electrical wiring.
What are the reasons people love whole house fans?
- Whole house fans offer homeowners the potential for substantial savings on cooling costs, especially in regions with cool nights.
- Modern models like the CentricAir whole house fans boast incredibly low running costs, often just costing a few pennies per hour.
- Newer versions operate quietly, with leading brands ensuring an ultra-quiet experience.
- These advanced ones don’t necessitate additional attic framing for installation.
- Whole house fans with enclosed motors are virtually maintenance-free, saving homeowners time and effort. They efficiently circulate air throughout the home and attic, delivering refreshing coolness.
What are the reasons some individuals are not fond of whole house fans?
Certain negative feedback about whole-house exhaust fans arises from poor installations or older models. However, significant improvements have been made by manufacturers like Comfort Cool Fans over the last 50 years.
With well-made newer models and proper installations, many of the following cons can be mitigated. Nevertheless, whole house fans may not suit everyone,
- Energy Consumption: Older models could consume up to 1000 watts of electricity, whereas central air conditioners use 3K to 5K watts per hour on average.
- Building Code Constraints: Building codes often stipulate a specific ratio of net free area to fan airflow. Some homes may not be compatible, leading to suboptimal performance if installed anyway.
- Unintended Effects: Larger whole-house fans that create indoor breezes can result in unintended consequences such as noise, heat loss, and depressurization. These effects can be mitigated with increased attic vents and window areas.
- Window Requirement: These fans require windows to be open while operating. Neglecting this step can lead to backdraft issues, motor damage, or even back-drafting of gas appliances.
- Noise and Vibrations: Older models are noisy, and improper installations can cause excessive vibrations and noise.
- Maintenance: Older belt-driven models demand maintenance every few years.
- Attic Framing: Some older models necessitate extensive framing alterations in the attic.
- Climate Suitability: Whole house fans are most effective in cooler climates. They might not offer significant energy savings in very hot regions and might not be suitable for use on hot and humid days.
FAQs
How Do Whole-House Fans Work?
Whole-house fans operate by expelling warm air out through roof vents while pulling in cooler outdoor air. They differ from attic fans, which only cool the attic. These fans are cost-effective compared to air conditioning systems and can complement them. However, using both simultaneously is not recommended.
Can You Install a Whole-House Fan Yourself?
Yes, if you possess basic DIY skills, you can tackle this project and potentially save on installation costs. The installation usually doesn’t require structural changes, making it relatively straightforward.
What About Wiring the Fan?
Wiring the fan into your home’s electrical system is more complex and potentially hazardous if not done correctly. Some areas prohibit homeowners from undertaking such electrical work. Before proceeding, verify the legality of wiring a whole-house fan in your location. If uncertain, it’s best to consult a professional.
Where should a whole house fan be installed?
The ideal location for a whole house fan is an unobstructed hallway. To identify the optimal spot in your home, access your attic and select the attic joists closest to the center. Ensure ample room for the fan shutters to open and close, while also avoiding excessive pipes or wires.
Is a whole house fan cheaper than AC?
Yes, typically, operating a whole house fan costs less than running an air conditioning system.
Conclusion
In summary, installing a whole-house fan offers a wide array of benefits, including energy savings, enhanced ventilation, and increased comfort levels in your home. However, achieving a successful installation requires careful attention and adherence to critical steps.
In addition, To begin, it’s essential to select an optimal location in an unobstructed hallway. Moreover, ensuring ample attic space for effective fan operation is crucial.
Further, the subsequent step involves constructing a sturdy support frame, followed by installing the mounting brackets as per the manufacturer’s instructions. A meticulous sealing of gaps and joints is vital to maintain overall energy efficiency.
While you might be tempted to tackle the electrical wiring, seeking the expertise of a professional electrician is strongly advised. This approach guarantees safety and compliance with local regulations, mitigating potential risks.