To protect your home from floodwater, use sandbags, install flood barriers or shields, seal gaps and cracks, elevate appliances and electrical systems, and keep a supply of waterproof materials like plastic sheeting and plywood for quick deployment.
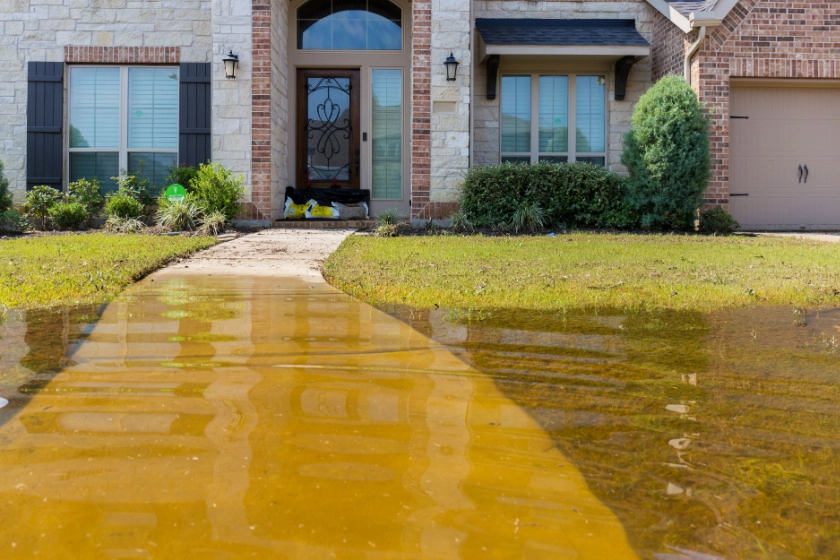
Imagine waking up to heavy rainfall and realizing that the streets outside your home have already transformed into a river.
As you anxiously watch the water level rise, you begin to worry about the safety of your house. Flood water can cause unimaginable damage, resulting in financial loss and emotional distress.
This is why taking every possible measure to protect your home from flooding is crucial. While there are professional services available, opting for do-it-yourself (DIY) flood prevention measures can offer numerous benefits.
It gives you a sense of control and security, saves money, and allows you to customize the preventive measures to suit your specific needs.
Let’s enlighten various DIY flood prevention methods to help you keep flood water out of your home and safeguard your property.
How to Keep Flood Water Out of House Diy?
Certainly, here’s a detailed step-by-step guide on how to keep flood water out of your house using DIY methods:
Protecting your house from floodwater is crucial to minimize damage and ensure safety. Here are several methods to consider:
Elevation:
Elevating your home on pilings or piers above the base flood elevation can prevent flood water from entering your living space. Ensure proper foundation and elevation design.
It needs the guidance of a structural engineer or architect experienced to mitigate the flood and reduce the property damage.
Install the Flood Barriers and Shields Around the Windows, Doors, and Other Openings
Here’s the general guide for creating a food barrier in your house,
Materials You’ll Need:
- Sandbags or alternative flood barrier materials (such as flood barriers, flood bags, or inflatable barriers)
- Shovels for filling sandbags
- Plastic sheeting or tarp
- Plywood or sheet metal
- Nails, screws, or fasteners
- Lumber for framing (if using plywood or sheet metal)
- Waterproof sealant
- Hand saw or power saw (if cutting materials)
- Safety equipment (gloves, goggles)
- Steps to Build Flood Barriers and Shields:
Evaluate Your Needs: Determine the areas of your property most vulnerable to flooding, such as doors, windows, and low-lying points. Plan the construction accordingly.
Acquire Materials: Purchase sandbags or alternative flood barrier materials. Ensure you have all the necessary tools and safety equipment.
Prepare Sandbags (if using): If using sandbags, fill them with sand, creating bags of uniform size and weight. Overfill them slightly, then tie the tops securely with twine.
Construct Barriers:
a. Sandbag Barriers:
- Stack the sandbags in a staggered pattern to create a stable barrier.
- Make sure each layer of sandbags overlaps the previous one to prevent gaps.
- Consider using plastic sheeting or tarp between layers for added waterproofing.
b. Alternative Flood Barriers:
- Follow the manufacturer’s instructions for assembling inflatable barriers, flood panels, or flood bags.
- Ensure they are securely positioned and anchored in place.
Reinforce Barriers (if needed):
If you’re using plywood or sheet metal, build frames to support them. Attach the material to the frame using nails, screws, or fasteners.
Seal Gaps and Joints:
You’ll need a waterproof sealant to seal any gaps or joints between barrier components and the structure you’re protecting. This helps prevent water infiltration.
Test the Barriers:
Before a flood event, perform a test to ensure the barriers are effective and properly sealed.
Monitor Water Levels:
During a flood, keep an eye on water levels. Be prepared to adjust or reinforce the barriers as needed.
Remove and Dispose of Sandbags (if using):
After the flood has receded, carefully remove the sandbags and dispose of them according to local regulations.
Inspect and Maintain:
Inspect your barriers after use for any damage. Repair or replace damaged components before storing them for future use.
Remember that effective flood protection also involves having an emergency plan, staying informed about flood warnings, and knowing when to evacuate if necessary.
Properly constructed barriers can help mitigate flood damage, but safety should always be a top priority.
Install the Sump Pumps in Your Basement
Installing a sump pump effectively prevents flooding in your home’s basement or lower levels. Here’s a step-by-step guide on how to install a sump pump:
Materials You’ll Need:
- Sump pump
- Sump pit
- PVC pipes and connectors
- Check valve
- Gravel or stone
- Screwdriver
- Pipe wrench
- Hacksaw
- Teflon tape
- Concrete mix (if needed)
- Power drill (if needed)
- Safety goggles and gloves
Steps to Install a Sump Pump:
Choose the Installation Location:
Select a location in your basement or the lowest area where water tends to collect. This is where you’ll install the sump pit.
Dig the Sump Pit:
Use a shovel or a mechanical digger to create a hole for the sump pit. Consider a deep pit to accommodate the pump and allow for a few inches of gravel or stone at the bottom. It should also be wide enough to work comfortably around the pump.
Prepare the Pit:
Line the bottom of the pit with gravel or stone to provide a stable base for the sump pump.
Install the Sump Pit:
Place the sump pit in the hole, ensuring it is level and stable. Use concrete mix to create a stable base if the pit doesn’t sit level.
Assemble the Pump:
Follow the manufacturer’s instructions to assemble the sump pump. This typically involves attaching the float switch, discharge pipe, and any other components.
Position the Pump:
Place the sump pump inside the sump pit. Ensure the pump is level and that the float switch moves freely.
Install the Check Valve:
Attach a valve to the discharge pipe and prevent water from flowing back into the pit once it’s pumped out. Use Teflon tape to seal the connections.
Connect the Discharge Pipe:
Connect the discharge pipe to the pump and route it to a suitable location where the water can be safely discharged away from your home. Ensure the pipe is sloped slightly downward away from the pump.
Secure the Discharge Pipe:
Use pipe clamps or brackets to secure the discharge pipe in place.
Test the Sump Pump:
Pour water into the sump pit or use a garden hose to fill it. The sump pump should activate automatically as the water level rises. Ensure it pumps the water out through the discharge pipe as expected.
Install a Sump Pump Cover (Optional):
Consider installing a cover over the sump pit to prevent debris and odors from escaping.
Plug in the Pump:
Plug the sump pump into a dedicated GFCI (Ground Fault Circuit Interrupter) outlet to ensure electrical safety.
Backup Power Source (Optional):
Consider installing a battery backup system to ensure the pump operates during power outages.
Regular Maintenance:
Test the sump pump periodically, especially before the rainy season. Clean the pit and ensure all components are in good working order.
Properly installed and maintained, a sump pump can help prevent basement flooding from your home.
Use Flood Vents in Your Foundation Walls to allow water to flow in and out, reducing hydrostatic pressure on the structure.
Flood vents are essential for reducing hydrostatic pressure on your home’s foundation during a flood, preventing structural damage. Here’s how to use flood vents effectively:
Materials You’ll Need:
- Flood vents
- Installation screws or fasteners
- Sealant or gaskets (if required)
- Screwdriver or power drill
- Safety goggles and gloves
Steps to Use Flood Vents:
Assess Your Home’s Needs:
Determine the appropriate number and size of flood vents required to meet local building codes and regulations. Your local building department can provide guidance.
Locate Installation Points:
- Identify the areas where flood vents need to be installed. Typically, they are positioned around the perimeter of the foundation, particularly in low-lying or flood-prone areas.
Choose Suitable Flood Vents:
Select flood vents that are compliant with local building codes and FEMA (Federal Emergency Management Agency) guidelines. Ensure they are properly rated for the expected flood level.
Install Flood Vents:
Follow the manufacturer’s installation instructions provided with the flood vents.
Typically, you’ll need to secure the flood vents to the foundation wall or crawl space wall using installation screws or fasteners.
Ensure the vents are positioned above the expected flood level at the correct height. They should automatically open when water pressure builds up.
Seal Gaps (if required):
Some flood vent installations may require the use of sealant or gaskets to create a watertight seal. Follow the manufacturer’s guidelines for sealing methods if necessary.
Test the Flood Vents:
Before a flood event, conduct a test to ensure that the flood vents open as designed when water pressure builds up. You can simulate this by pouring water into the vents or using a hose.
Maintain Regularly:
Periodically inspect the flood vents to ensure they are in good working condition. Clean any debris that might obstruct their operation.
Educate Household Members:
Ensure your family members know the flood vents and understand their purpose. Train them on how to respond during a flood event, including evacuation if necessary.
Monitor Flood Alerts:
Stay informed about weather forecasts and flood alerts in your area. Be prepared to act and close off areas below the flood vents when flooding is imminent.
Flood vents are a passive flood mitigation measure that can significantly reduce the risk of structural damage during a flood.
Proper installation and maintenance are important to ensure their effective operation. Always consult with local authorities and follow building codes and regulations when installing flood vents.
Seal Gaps and Cracks in The Foundation And Walls
Sealing and waterproofing gaps and cracks in your home is crucial to prevent flood water from entering. Here’s a step-by-step guide on how to effectively seal and waterproof these areas:
Materials You’ll Need:
- Waterproof sealant (silicone caulk, polyurethane caulk, or hydraulic cement)
- Backer rod or foam rope (for larger gaps)
- Putty knife or caulking gun
- Wire brush or scraper
- Clean rags or towels
- Protective gloves and safety goggles
Steps to Seal and Waterproof Gaps and Cracks:
Identify Problem Areas:
Check the gaps, cracks, and openings in the foundation, walls, and around doors and windows where floodwater could enter.
Clean and Prepare the Surfaces:
Remove dirt, debris, loose paint, or old sealant from the gaps and cracks with a wire brush or scraper. Clean the surfaces thoroughly.
Choose the Right Sealant:
Select a waterproof sealant suitable for your specific needs. Silicone or polyurethane caulk is ideal for smaller cracks, while hydraulic cement is suitable for larger gaps or holes.
Fill Small Cracks and Gaps:
For cracks less than 1/2 inch wide, apply a bead of silicone or polyurethane caulk directly into the crack. Use a caulking gun for precise application. Smooth the caulk with a putty knife, filling the gap fully. You can also use your finger instead of the caulk.
Use Backer Rod for Larger Gaps:
For gaps wider than 1/2 inch, insert a backer rod or foam rope into the gap before applying caulk. This provides additional support and helps the sealant adhere properly.
Apply Hydraulic Cement (for larger openings):
Mix hydraulic cement for large holes or openings according to the manufacturer’s instructions. Apply the hydraulic mixture into the hole using a putty knife or trowel, ensuring it fills the opening completely.
Smooth and Shape the Sealant:
Utilize a putty knife to smooth the sealant and level with the nearby surface. Remove any excess sealant.
Allow to Cure:
Follow the manufacturer’s recommended curing time for the sealant. This typically ranges from a few hours to a day or more.
Check for Proper Sealing:
After the sealant has cured, inspect the areas again to ensure no gaps or cracks are remaining. Reapply sealant if necessary.
Paint or Finish (if desired):
If the sealed area is visible and you want a finished look, paint or finish it to match the surrounding surfaces.
Repeat for Other Problem Areas:
Continue this process for all gaps and cracks in your home, paying special attention to areas prone to flooding.
Regularly inspect and maintain the sealed areas to ensure they remain waterproof. Additionally, consider installing flood barriers, flood vents, and other flood mitigation measures for comprehensive flood protection.
Finally, tailoring your flood protection measures to your specific location and flood risk is essential.
Consulting with local authorities and experts can provide valuable guidance on the most effective methods to protect your house from floodwater.
FAQs
What’s the first step in keeping flood water out of my house?
Start by assessing your property’s vulnerabilities, including checking for leaks, weak points in the foundation, and the home’s elevation relative to flood-prone areas.
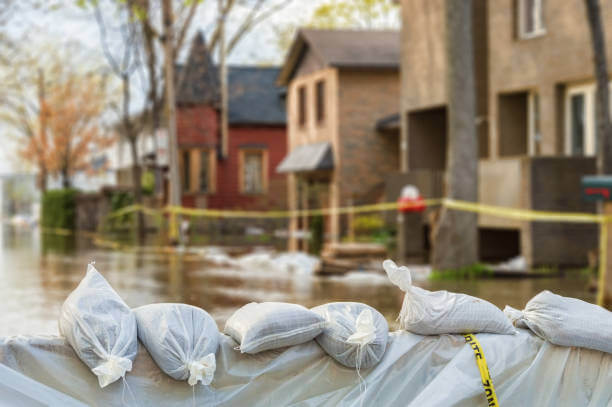
Can I use sandbags to prevent flooding?
Yes, you can use sandbags to prevent flooding, which can be effective. Properly stack and arrange them around entry points like doors and windows to create a barrier against rising water.
Are there alternatives to sandbags for flood protection?
Yes, there are multiple alternatives to sandbags for flood protection. You can use inflatable flood barriers, flood panels, or flood bags as alternatives to sandbags. They are easier to store and deploy.
Should I seal my doors and windows with waterproofing materials?
Yes, you should seal your doors and windows with waterproofing materials. Applying waterproof sealant or weather-stripping to doors and windows can help prevent water from seeping in. Ensure they are properly sealed and maintained.
Can I install flood vents in my home to prevent water buildup?
Yes, flood vents allow water to flow through your home’s foundation, reducing the pressure on walls and preventing structural damage. Ensure they meet local building codes.
Are there any landscape modifications I can make to prevent flooding?
Yes, you can make landscape modifications such as creating proper drainage systems, using berms swales and diverting water away from your home to help prevent flooding.
Is it advisable to elevate my home to protect it from floods?
Yes, elevating your home is advisable in flood-prone areas to protect it from flood damage and reduce the risk of costly repairs and losses.
Should I create an emergency flood plan for my family?
Yes, creating an emergency flood plan for your family is essential to ensure everyone’s safety and preparedness in case of a flood.
Can insurance help with flood damage costs?
Yes, flood insurance can help cover the costs of damage caused by flooding, including structural repairs and the replacement of damaged belongings. Still, it’s typically a separate policy from standard homeowners’ insurance.
Conclusion
Eventually, it is crucial to take proactive steps to protect your home from flood water. You can greatly lower the chance of water damage by using DIY flood prevention methods like setting up flood barriers, sealing gaps, and raising valuable items.
However, it is essential to recognize these measures’ importance and ability to keep your house safe during flooding.
Therefore, I encourage you to implement the outlined strategies for flood protection to ensure the safety of your home and belongings.