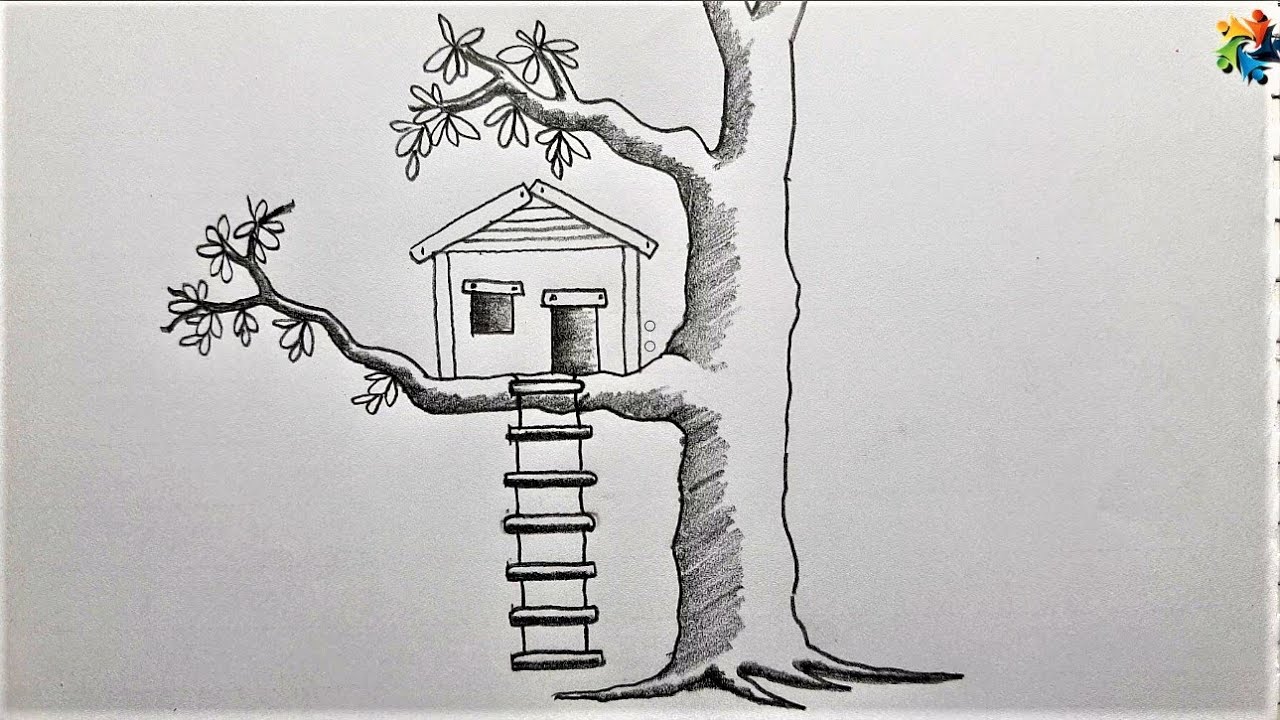
Drawing a treehouse can be a fun and creative activity! Here’s a quick guide to help you get started.
- Start with the outline of the tree trunk and branches.
- Draw the basic shape of the treehouse’s base on a branch.
- Sketch walls, windows, and a roof on the base.
- Include a balcony, ladder, and other details for interest.
- Draw beams or ropes connecting the treehouse to branches.
- Add texture and shading to the tree and treehouse.
- Use coloured pencils to add colour.
- Review, erase guidelines, and refine details.
What Are The Step-by-Step Process For Drawing?
Unlocking the artistry of drawing unfolds in a series of step-by-step processes, guiding the transformation of imagination onto the canvas with precision and creativity.
Sketching the Main Tree Trunk
Thickness and Texture:
- Begin by lightly sketching the basic shape of the tree trunk. Consider the overall thickness and tapering as it goes upward.
- Trees often have irregular shapes, so don’t worry about perfection.
- Add organic curves and bulges to mimic the natural texture of a tree trunk. Study reference images to understand how bark patterns flow.
Bark Details:
- Once the basic shape is established, start adding bark details. Indicate rough patches, cracks, and lines.
- Vary the thickness and darkness of your pencil strokes to create texture. Some areas might have smoother bark, while others are more rugged.
- Use your reference images to guide the placement and style of the bark details.
Designing the Platform and Flooring
Size and Shape:
- Sketch the shape of the platform where the tree house will be built. Consider the proportions in relation to the tree trunk.
- Define the edges and corners of the platform. It can be circular, rectangular, or any shape that complements the tree.
Support Structures:
- Draw the support beams connecting the platform to the tree trunk. These beams should reflect realism and engineering principles.
- Consider the angles and attachment points of the supports. Research how real tree houses are built for inspiration.
Adding Walls and Roof
Wall Placement:
- Sketch the walls around the platform, leaving openings for doors and windows. The walls should follow the contours of the platform and adhere to the shape of the tree house.
- Take care to ensure that the walls are properly aligned with the perspective lines you established earlier.
Roof Style:
- Decide on the type of roof your tree house will have. It could be a gabled roof, flat roof, dome-shaped, etc.
- Sketch the roof, paying attention to how it intersects with the walls. Capture the appropriate angles and dimensions for a cohesive look.
Incorporating Details
Windows and Doors:
- Position windows and doors according to the layout of the walls. Consider how they fit within the overall design.
- Sketch the window frames, including any mullions or dividers. Doors should have handles, knobs, or other relevant features.
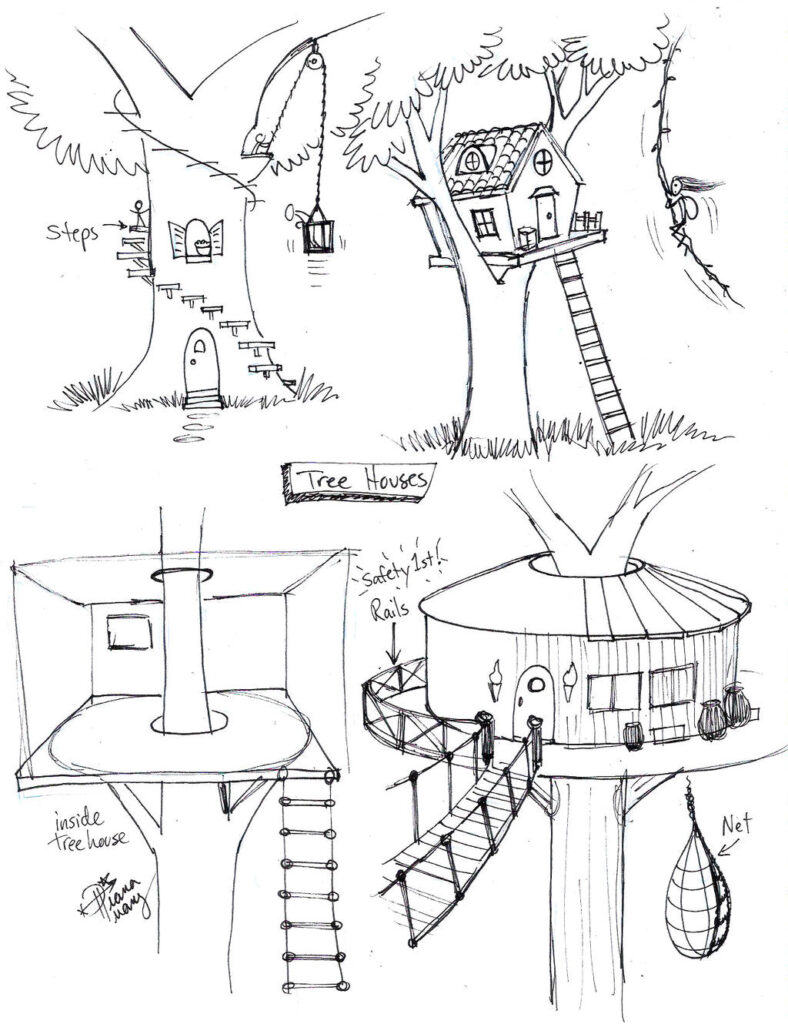
Balconies or Ladders:
- If your design includes balconies or ladders, draw them to connect seamlessly with the structure. Ladders should appear functional and appropriately sized.
Decorative Elements:
- Add creative elements such as planters, lanterns, or intricate carvings to personalise your tree house.
- Balance realism with artistic flair. These elements contribute to the uniqueness of your drawing.
How Can You Prepare to Draw a Tree House?
Embarking on the creation of a treehouse masterpiece requires careful preparation, from envisioning the design to considering the practicalities of construction.
Gathering Materials
- Paper or Sketchbook: First, choose a sketchbook or paper suitable for your preferred medium. A thicker paper prevents bleed-through and allows for erasing and shading.
- Pencils, Erasers, and Sharpener: Then, use a range of graphite pencils (e.g., HB, 2B, 4B) for different line intensities. A good eraser ensures clean corrections. Keep a sharpener handy for maintaining pencil points.
- Ruler and Compass: Moreover, a ruler helps create straight lines, and a compass aids in drawing circles or arcs accurately.
- Coloured Pencils or Markers (optional): However, if you plan to add color to your drawing, choose coloured pencils or markers that complement your design.
Finding Reference Images
- Online Resources: Utilise websites, social media, and image search engines for a wide range of tree house references. Look for various styles, settings, and details.
- Books and Magazines: Art books, architectural magazines, and even children’s storybooks can provide rich visual references. They offer diverse perspectives and unique designs.
What Are the Best Process for Understanding the Structure?
Navigating the path to comprehending a complex structure is best achieved through a systematic process that involves diligent exploration, analysis, and a methodical unravelling of its key components.
Basic Shapes
- Main Tree Trunk: Start by sketching the main tree trunk. Pay attention to its thickness, texture, and any unique features like knots or branches.
- Platform and Flooring: Draw the base where the tree house sits. Consider its size, shape, and any support structures connecting it to the tree.
- Walls and Roof: Sketch the walls around the platform, leaving openings for doors and windows. Decide on the type of roof, be it pitched, flat, or something creative.
Perspective and Proportions
Horizon Line: Establish the horizon line to determine eye level. This helps in achieving a realistic three-dimensional effect.
Vanishing Points: Understand the concept of vanishing points. Objects closer to the viewer appear larger, while those farther away converge towards these points.
- Use one-point perspective for a frontal view.
- Two-point perspective for a corner view.
- Three-point perspective for a more dynamic or overhead view.
- Place vanishing points outside your drawing area for a better range of perspective.
Experiment with horizon line placement and vanishing points for unique compositions.
How Can You Focus on Realism and Creativity?
Balancing the realms of realism and creativity requires a delicate fusion, where attention to detail harmonises with imaginative flair, resulting in a masterpiece that resonates with both authenticity and innovation.
Adding Texture and Depth
Shading Techniques:
- Use techniques like hatching (parallel lines), cross-hatching (crisscrossing lines), and stippling (dots) to create different textures.
- Match the direction of your shading to the form of the objects. For example, shade the tree trunk following its contours.
Highlighting and Shadows:
- Identify your light source and imagine where it hits the surfaces. Light areas are highlighted, while shadow areas are opposite.
- Gradually transition from light to shadow using various shades of graphite. This enhances the three-dimensional illusion.
Introducing Natural Elements
Leaves and Foliage:
- For leaves, use small, loose, and irregular strokes to suggest clusters. Vary the size and density as you move from foreground to background.
- Consider the type of tree; different trees have distinct leaf shapes and arrangements.
- Utilize erasers to lift off graphite to create highlights on individual leaves.
Birds and Animals:
- Keep them simple and in proportion to the tree house. Sketch their basic shapes and add a few defining features.
- Birds can be shown in flight or perched on branches. Animals can be peeking out from behind the tree trunk or exploring the surroundings.
Customization and Personalization
Unique Features:
- Add features that make your tree house special, such as a telescope, hanging lanterns, or a swing.
- Consider the function of the tree house: Is it a playhouse, a hideaway, or an artist’s studio? Let the purpose guide your unique additions.
Imaginative Touches:
- Infuse your drawing with creative flair. Experiment with fantastical elements like magical doors, floating platforms, or imaginary creatures.
- Balance these touches with the overall realism of the scene for an intriguing contrast.
How Can You Finalize the Drawing?
Bringing a drawing to its conclusion entails a deliberate process of refining, evaluating, and adding the finishing touches that ultimately culminate in a polished and satisfying artistic creation.
Erasing Guidelines:
Carefully erase any unnecessary construction lines, guidelines, and smudges. Use a gentle touch to avoid damaging the paper’s surface.
Strengthening Important Lines:
Darken and refine essential lines, such as the outlines of the tree house, major branches, and significant details.
Moreover, emphasize focal points by slightly darkening lines and areas to draw the viewer’s eye.
Color Palette Selection:
Choose colors that enhance the mood and atmosphere of the scene. Natural tones for the tree and vibrant or muted colors for details can work well.
Color Application Techniques:
However, if using colored pencils, layer colors gradually for smooth blending. Experiment with different pressure levels to achieve depth.
For markers, start with light layers and build up intensity. Use markers with different tips for varied effects.
FAQ’s
How do you draw a rainbow?
Draw overlapping semicircles of different colors to form the arcs of the rainbow. Start with red on top and follow the order: red, orange, yellow, green, blue, indigo, violet.
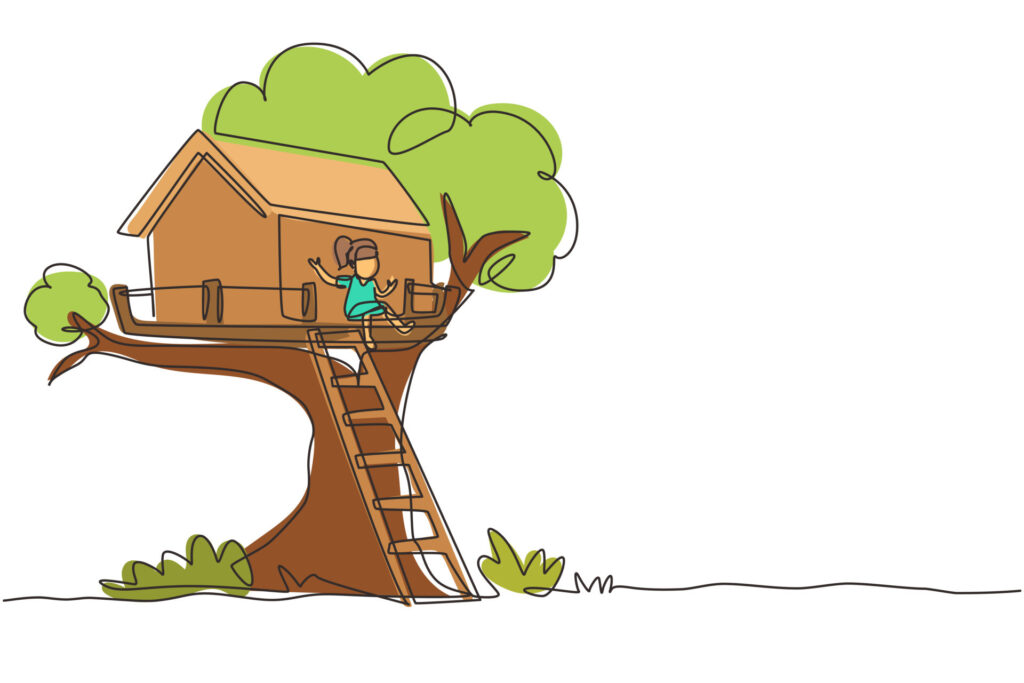
How do you draw a realistic tree house?
Sketch the main tree trunk and platform, add walls and roof, and then detail with windows, doors, and textures. Enhance realism through shading, foliage, and accurate perspective.
How to draw a house 3D?
Begin by sketching the basic outline of the house. Use perspective lines to guide the 3D structure. Add details while maintaining correct angles and proportions.
How do you draw a horror tree?
Depict twisted branches, dark shading, and irregular shapes. Add gnarled knots, sharp thorns, and eerie shadows for a haunting effect.
How do you draw a cool tree?
Create a unique silhouette with uneven branches. Add texture to the trunk and canopy. Consider adding vines, nests, or imaginative elements for a cool touch.
What is a tree house called?
A tree house can also be called a “tree fort” or “tree dwelling,” depending on its size and purpose.
What makes a good treehouse?
A good treehouse balances safety, creativity, and functionality. It integrates well with the natural surroundings, has secure support, and offers an enjoyable space.
How to build a tree deck?
Choose a sturdy tree, design a platform, and build support structures. Use appropriate tools, materials, and secure fasteners. Prioritize safety and structural integrity.
Final Thought
In conclusion, drawing a tree house is a fascinating journey that combines technical skills, creativity, and imagination.
By following a step-by-step approach, you can create a captivating depiction of a tree house that brings your vision to life on paper. From understanding the structural elements to adding intricate details and personal touches, each stage of the process contributes to the overall charm of your artwork.
In addition, drawing a tree house is not just about replicating an image; it’s about infusing your personality and artistic flair into the scene.
As you refine your skills in perspective, shading, and incorporating natural elements, you’re also cultivating your unique style as an artist. Remember that every stroke of your pencil or brush is an opportunity to express your creativity and explore new possibilities.